
A few months ago, a friend of mine challenged me to beat him on a video game called Endless Lake on Facebook. It took me a long time to almost reach his high score manually like a human being.
But this also made me realize that it was an opportunity to finally get my hands on Machine Learning, by creating a software that would beat the game, ideally until the counter explodes.
This post is the first in a series on making an artificial intelligence for the Endless Lake video game, based on deep learning and other machine learning techniques. This paragraph will be updated while I’ll discover new and different techniques to make this AI more efficient.
In the meantime, you can take a look at my project inside the endless-fake repository, which is a toolset helping me to benchmark image recognition and Machine Learning techniques quickly and comfortably.
Game Overview
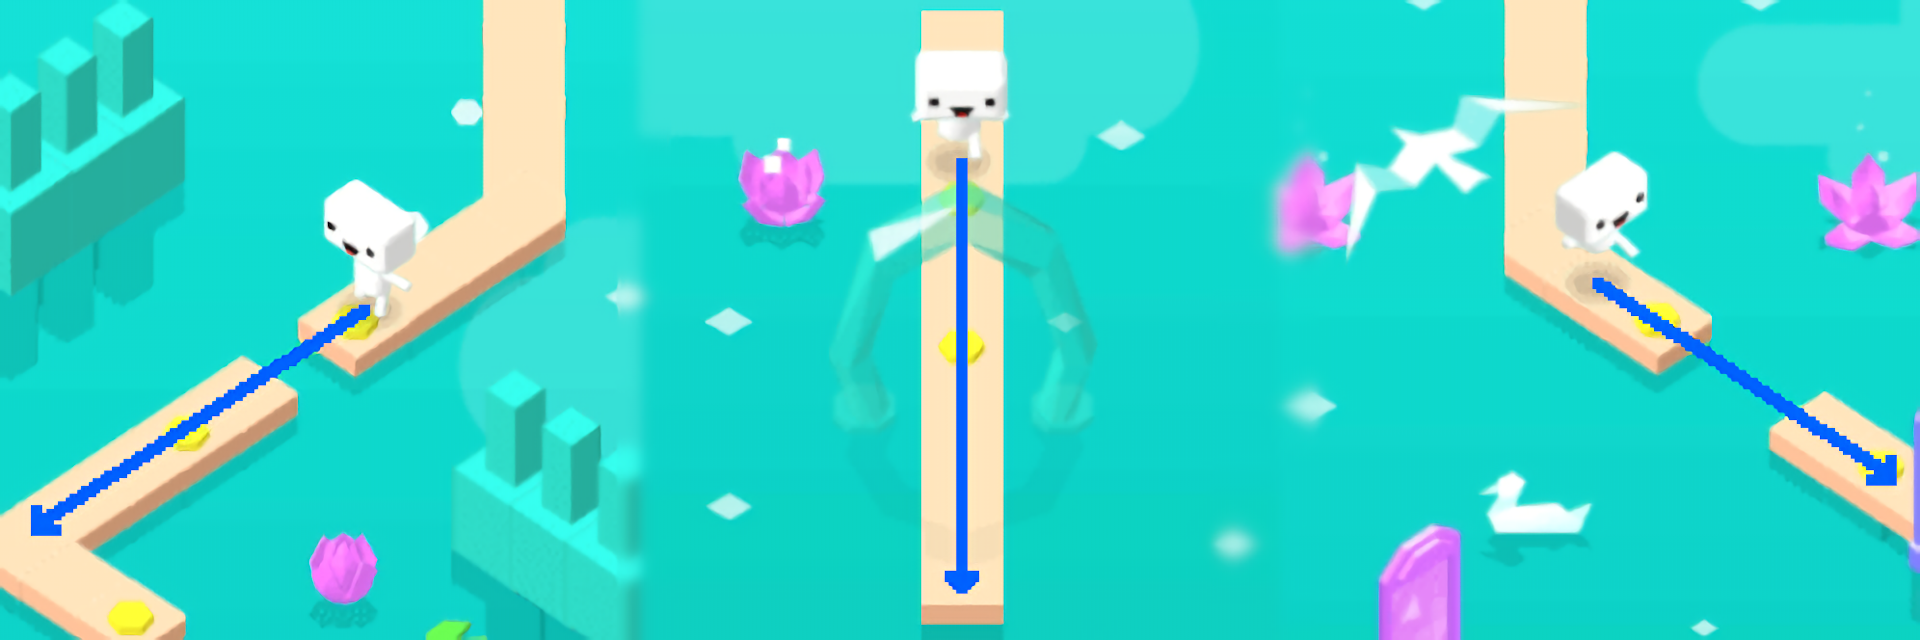
Before we go further, let’s take a quick look at the video game itself. It’s a web-browser based one, which goal results in jumping into three different ways to avoid falling into the lake.
 The quick jump, requiring you to perform a single tap, is more than enough for a short gap and recommended for almost any kind of situation, especially if we encounter a tiny platform right after the gap.
 The double jump, which could be performed with a double-tap, would be necessary to get over wider gaps than usual.
 Then comes the long jump, which could be done with a single tap, followed by another one after a short pause while the character is still floating in the air. That one is very rarely used over extremely wide gaps.
Now that we’ve seen every action possible, including the ability to just wait before the next gap. We’ve also realized that our decisions will depend on these three factors:
- Distance remaining until we reach the next gap
- Length of that same gap
- Length of the next platform we’ll land on
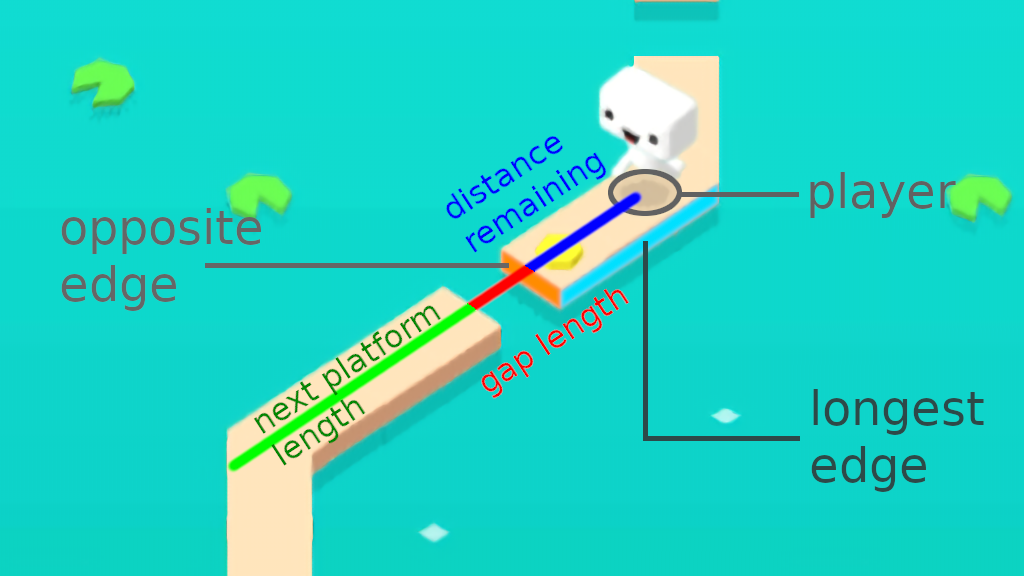
All we need to do is retrieving these three values before passing them to our Machine Learning model so it can determine the best decision to take depending on these numbers.
Capturing the image
Let’s see how we can play the game and take screenshots before analyzing them. For the sake of simplicity, we’ll use the Python programming language with the OpenCV image processing library.
First, we need to execute the game inside a web browser. Here are two methods for simply doing this task.
Using Chromium Embedded Framework
This solution is the one I would recommend at a first glance, using the cefpython package. It consists of running a standalone process of the Google Chromium web browser and control it entirely.
from cefpython3 import cefpython as cef
import numpy as np

class BrowserHandler:
    def __init__(self, parent):
        self.parent = parent
        self.image = None

    def OnPaint(self, browser, element_type, paint_buffer, **_):
        buffer = paint_buffer.GetString(mode="bgra",
            origin="top-left")
        self.image = np.fromstring(buffer, np.uint8)
            .reshape((640, 360, 4))


browser = cef.CreateBrowserSync(url="http://127.0.0.1", settings={
    "windowless_rendering_enabled": True
})
browser.SetClientHandler(BrowserHandler())
But I’ve been through some side effects, such as the requirement to execute it inside a separate thread since it will block your whole process. Its windowless rendering feature allowing us to retrieve directly the raw pixels of the image is a very neat one, but it might not be working properly under Linux being my favorite operating system.
If you can manage to overcome these issues, then it would become the easiest solution and the most complete one fitting your needs.
Using Selenium
My favorite option, a combination of the selenium package with a native way to capture screenshots continuously using my Python package called nativecap.
import nativecap
import numpy as np
from selenium import webdriver
from selenium.webdriver.chrome.options import Options

chrome_options = Options()
chrome_options.add_argument("--mute-audio")
chrome_options.add_argument("--allow-file-access-from-files")
chrome_options.add_argument("--no-proxy-server")

driver = webdriver.Chrome(executable_path="./chromedriver",
                          chrome_options=chrome_options)
driver.set_window_rect(x=10, y=0, width=500, height=640 + 133)
driver.get("http://127.0.0.1")

# ...

position = driver.get_window_position()
buffer = nativecap.capture(position['x'], position['y'], 360, 640)
data = np.ctypeslib.as_array(buffer)
image = data.reshape(640, 360, 4)[:, :, :3]
Selenium is normally intended to be used as a functional testing tool for web development, it will open your already existing web browser in testing mode, then allow you to simulate clicks or keyboard typing directly from the same Python script. All of this in a non-blocking manner.
Finding the player
After taking a look at this image, we can notice a little shadow right under the character. Let’s filter it with the OpenCV’s inRange method, which takes the minimum and maximum RGB values as parameters.
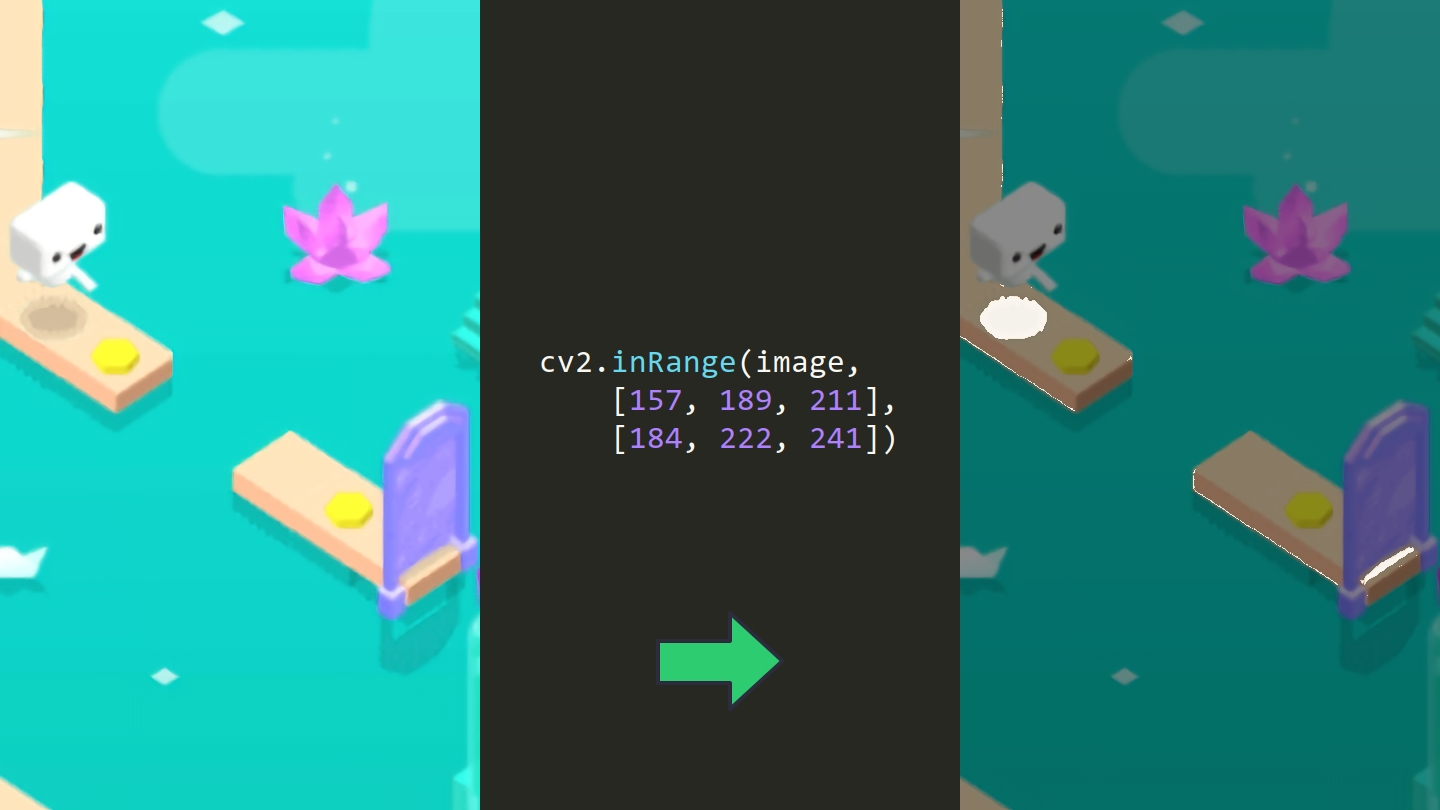
Now we can see exactly where our player is, but we also might encounter some cases where these same colors are used in unexpected places of the image, mostly in some situations where the player would be cloned multiple times.
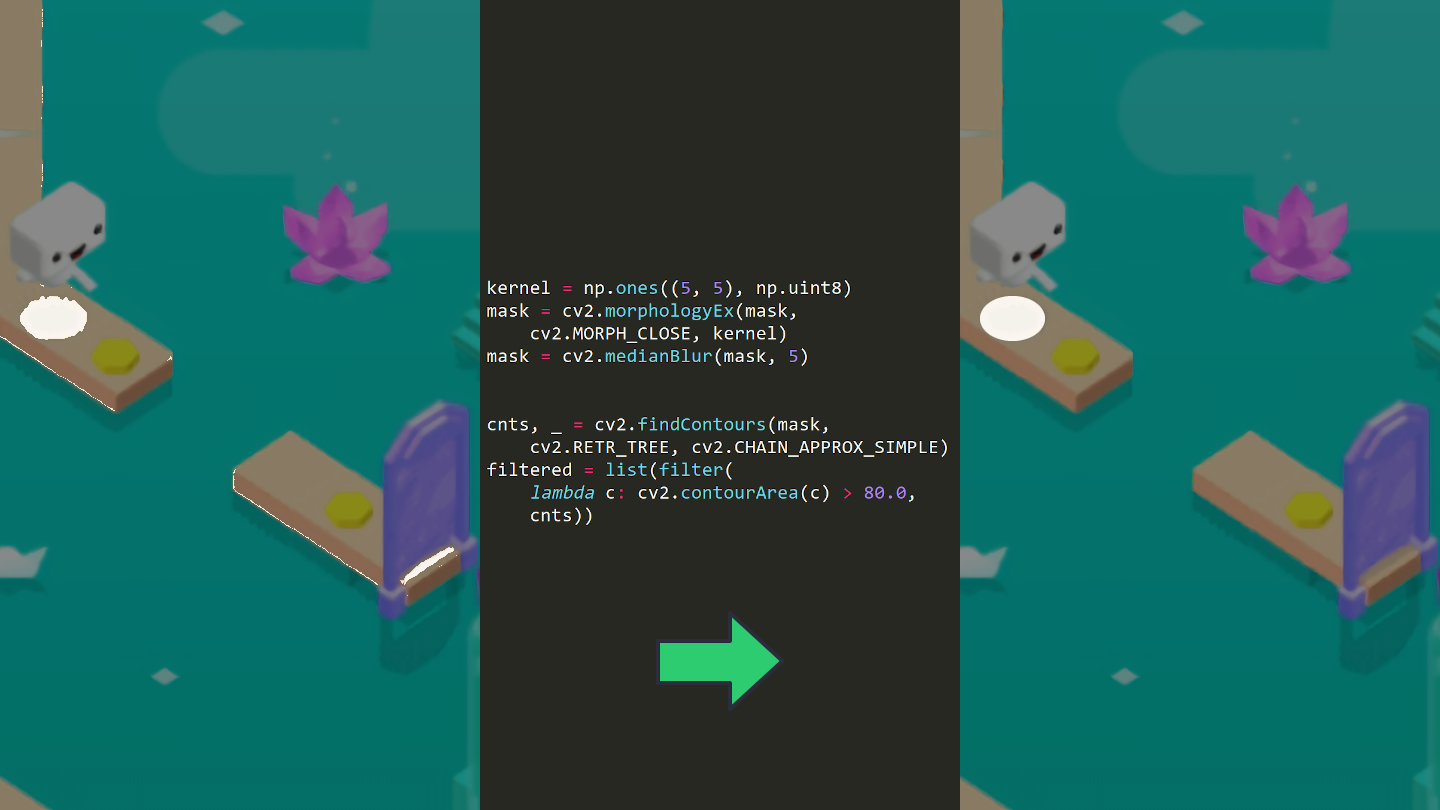
We can safely apply morphing techniques (erosion and dilatation) to get rid off tiny pixels, blurring, then only keep the biggest groups of pixels.
kernel = np.ones((5, 5), np.uint8)
mask = cv2.morphologyEx(mask, cv2.MORPH_CLOSE, kernel)
mask = cv2.medianBlur(mask, 5)

cnts, _ = cv2.findContours(mask, cv2.RETR_TREE,
    cv2.CHAIN_APPROX_SIMPLE)
filtered = list(filter(lambda c: cv2.contourArea(c) > 80.0, cnts))
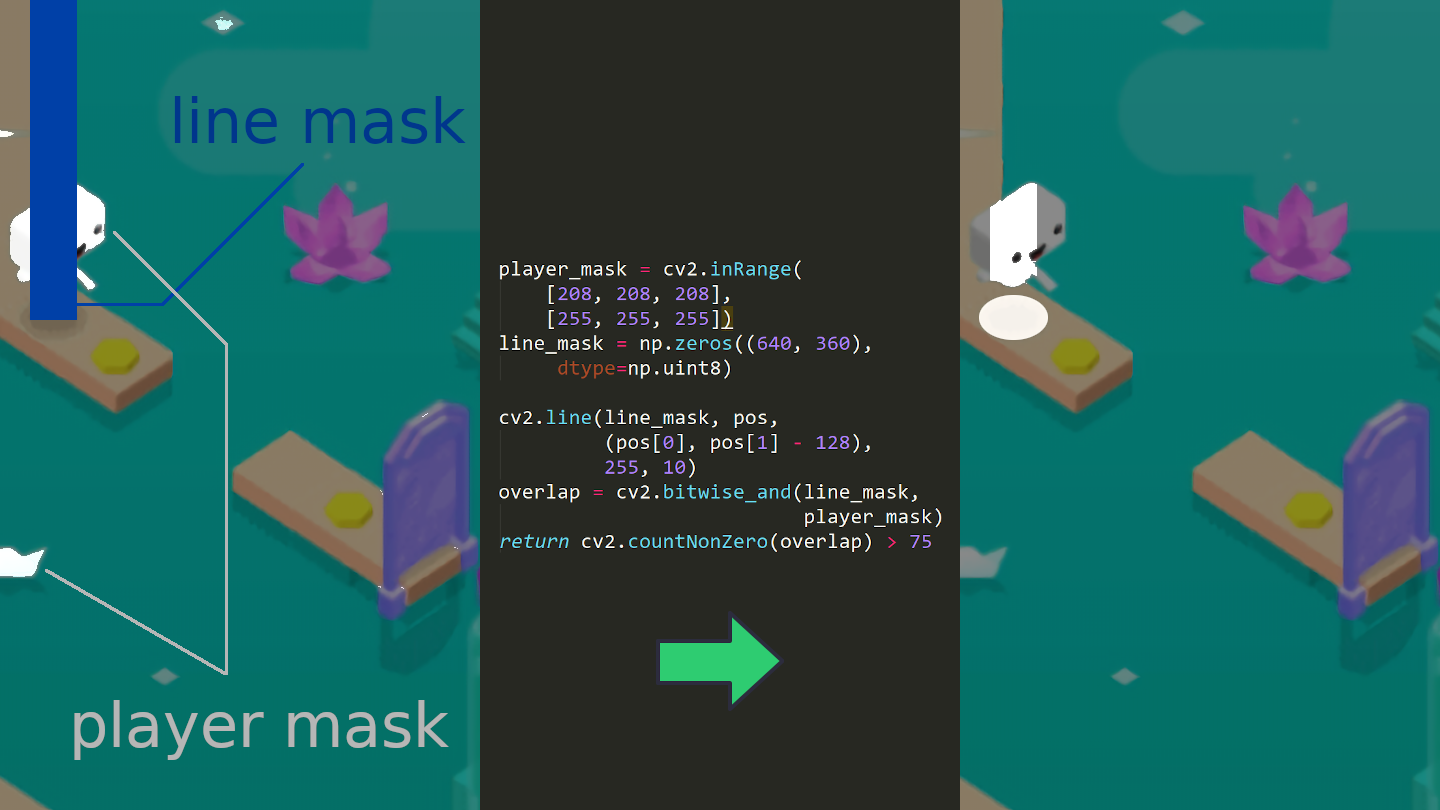
To make sure that we don’t mistake a player’s shadow for something else, I decided to retrieve the white pixels belonging to the player, draw a vertical line starting from the shadow directing to the top, then count the white pixels overlapping with that same line.
player_mask = cv2.inRange([208, 208, 208], [255, 255, 255])
line_mask = np.zeros((640, 360), dtype=np.uint8)

cv2.line(line_mask, pos, (pos[0], pos[1] - 128), 255, 10)
overlap = cv2.bitwise_and(line_mask, player_mask)
return cv2.countNonZero(overlap) > 75
Determining the direction
Before retrieving our first value, being the remaining distance to our next gap, we must determine our player’s direction which could be left, right, or bottom.
In the beginning, I’ve been struggling a lot by simply filtering the platform’s pixels. That method ended up being very messy since we can encounter obstacles like some birds flying randomly over your path, or little arches obstructing our view.
Then I just figured out that it could be quite simpler! If we take a closer look at the platform’s edges, we can notice that each one of these has a unique color. All we need to do is filtering these, then grab the longest and closest one to the player.
left_mask = cv2.inRange([142, 177, 231], [169, 209, 255])
right_mask = cv2.inRange([112, 146, 196], [148, 186, 234])
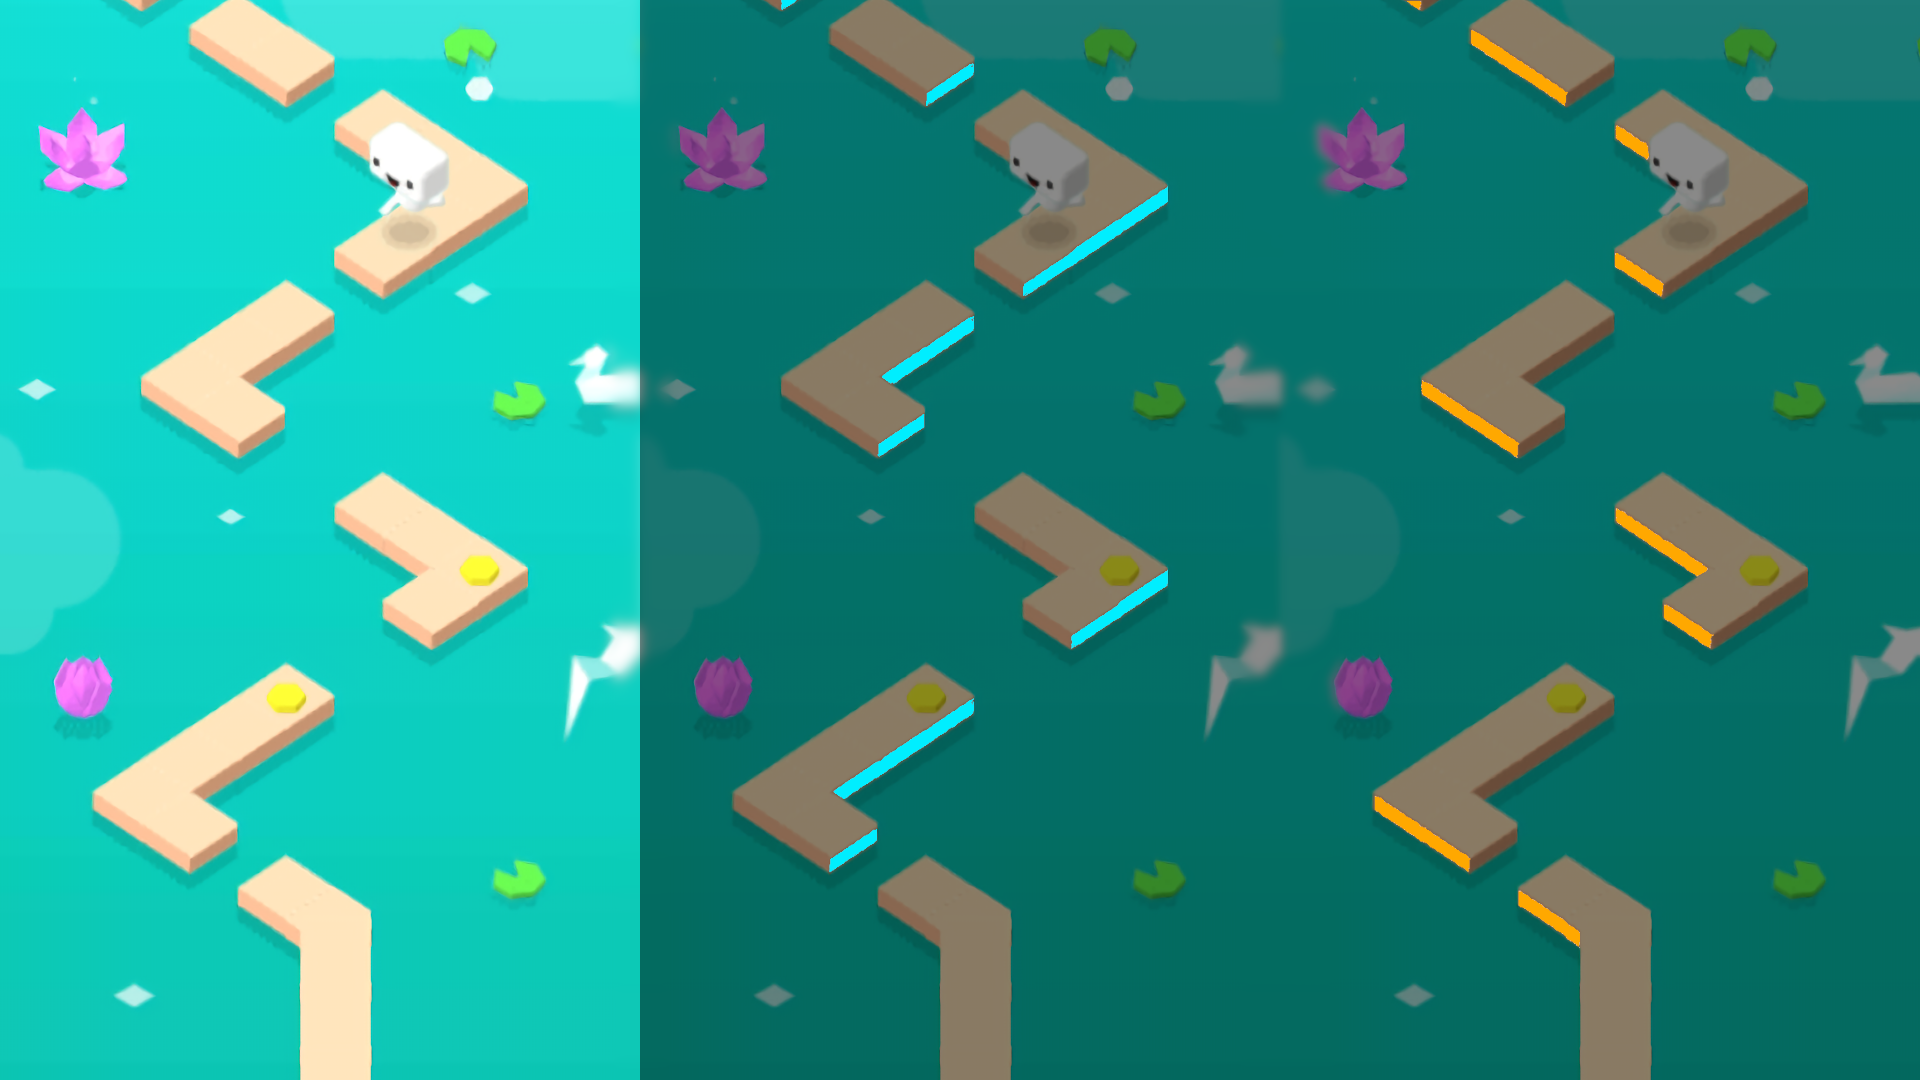
That way, we can not only determine the player’s direction but also the opposite edge defining the platform’s end, where a jump would be required before falling into the lake.
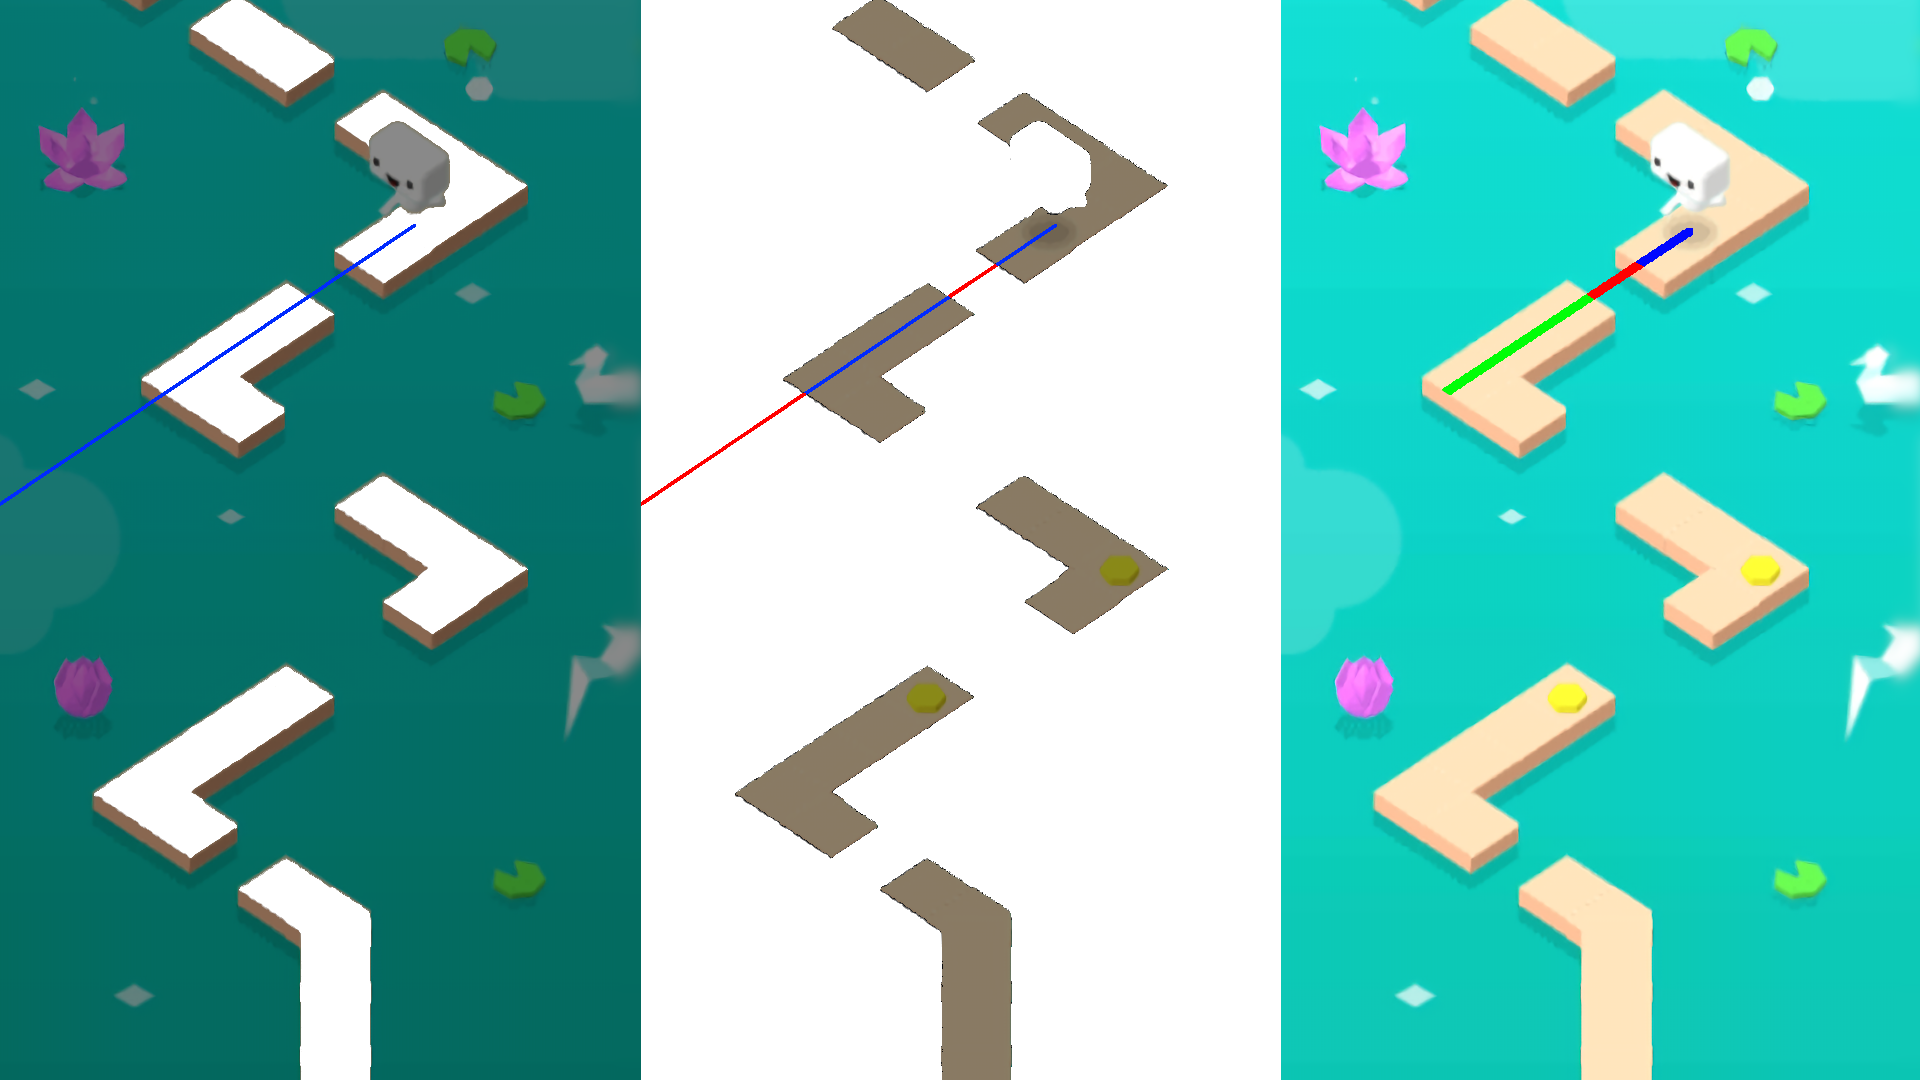
To achieve that, we need to draw two lines, both going respectively to the left and right direction. Retrieve the overlapping edges, keep the closest ones, then the longest one will be defined as the player’s direction.
def draw_line(image, start, angle, length):
    x = int(start[1] + length * math.cos(angle * math.pi / 180.0))
    y = int(start[0] + length * math.sin(angle * math.pi / 180.0))
    cv2.line(image, coords, (y, x), 255, thickness=5)

left_sample = np.zeros((640, 360), dtype=np.uint8)
right_sample = np.zeros((640, 360), dtype=np.uint8)

draw_line(left_sample, coords, -56.5, 300)
draw_line(right_sample, coords, 56.5, 300)

left_overlap = cv2.bitwise_and(left_sample, left_mask)
right_overlap = cv2.bitwise_and(right_sample, right_mask)

Retrieving our values
We’ve got our direction, that’s great! The distance remaining until the gap can be determined by calculating the one between the player’s position and the edge’s center.
def get_closest_edge(edge_mask, start):
    edges = []

    cnts, _ = cv2.findContours(edge_mask,
        cv2.RETR_TREE, cv2.CHAIN_APPROX_SIMPLE)
    cnts = list(filter(
        lambda c: cv2.contourArea(c) > 10.0, cnts))
    for cnt in cnts:
        m = cv2.moments(cnt)
        cx = int(m["m10"] / m["m00"])
        cy = int(m["m01"] / m["m00"])

        edges.append((cv2.norm(start, (cx, cy)),
                      (start[0], start[1]),
                      (cx, cy)))

    if len(edges) < 1:
        return None

    return sorted(edges)[0]
As for the gap’s length, we can still draw a line from the player’s position pointing to its direction until the end of the image, then see how many pixels are overlapping the platform’s. That way we would obtain the next platform’s length by overlapping on its inverted mask.
Wrapping Up
That’s all for the image recognition process! As you may have figured out, I planned to use these values for a neural network model. More details will come into another blog post once I successfully deal with this.
I’m completely aware that there are certainly better ways to deal with this kind of problem, such as the use of CNNs (Convolutional Neural Networks), which would just require us to send images to our Machine Learning model.
These methods will be covered as soon as I can get my hands on them. Feel free to leave a comment below if you have better ideas!


Leave a comment