
In 2023, starting a new React app involves embracing cutting-edge tools and techniques that not only boost productivity but also enhance code quality.
Whether you’re a seasoned developer or just getting started, this comprehensive guide will walk you through the process of bootstrapping a new React app with the minimum recommended to create your app with confidence.
We’ll cover important steps that are both essential, including:
- Bootstrapping the app with the lightning-fast Vite instead of the
traditional
create-react-apputility. - Installing a CSS framework like Tailwind CSS,
- Making a robust foundation for your code through effective linting and formatting with ESLint and Prettier.
- Ensuring code stability and functionality with comprehensive unit, end-to-end, and component tests using tools like Vitest and Cypress.
- Incorporating Storybook for isolated and focused component development,
- Implementing a CI/CD pipeline with GitHub Actions.
By following these steps, you will be able to ensure a solid foundation for your upcoming React projects.
Create a git repository
Setting up a proper version control system for your project is still crucial before going any further. This would allow you to save your modifications and revert them when needed, but also to share your progress and collaborate with other developers around the world.

Assuming that you’ve created a new repository on
GitHub called my-app, under the account
unnamedcoder, you can initialize a new git repository locally by following the
provided instructions.
$ mkdir my-app && cd my-app
$ git init
$ git remote add origin git@github.com:unnamedcoder/my-app.git
Use Vite to bootstrap your app
We’ve been using create-react-app for years, but it’s time to move on. New alternatives like Vite offer several advantages, including faster performance, improved configuration flexibility, native support for modern web standards and compatibility with other popular frontend frameworks.
Bootstrapping a new React application using TypeScript with Vite is as simple as running the following command:
$ npm init vite@latest . -- --template react-ts

Need to install the following packages:
  create-vite@4.3.1
Ok to proceed? (y) y

Scaffolding project in /home/unnamedcoder/my-app...

Done. Now run:

  npm install
  npm run dev
As stated above, we just have to execute npm install to have our dependencies
ready, then npm run dev to run our fresh new app.
$ npm run dev

  VITE v4.3.7  ready in 326 ms

  ➜  Local:   http://localhost:5173/
  ➜  Network: use --host to expose
  ➜  press h to show help
Open your favorite web browser, then head to the URL mentioned in the output. You should see the default React app generated by Vite running flawlessly.
Everything is already configured, including the hot module replacement allowing
the app to reload automatically every time you do a modification. You won’t
need to execute npm run eject anymore.
Install a CSS framework
Writing pure CSS code is fun, but also time-consuming and error-prone. It looks like writing assembly code to me. But thanks to Vite, we can directly write SASS, SCSS or LESS code in our React components.
However, you may want to use a CSS framework to speed up your development such as Tailwind CSS, now is your chance to finally take a look at this marvel.
$ npm install -D tailwindcss postcss autoprefixer
$ npx tailwindcss init -p
Add the following lines at the bottom of the src/index.css file:
@tailwind base;
@tailwind components;
@tailwind utilities;
Configure Tailwind CSS to look for index.html and every kind of source code
inside the src folder by applying the following modifications inside the
tailwind.config.js file:
 /** @type {import('tailwindcss').Config} */
 export default {
-  content: [],
+  content: [
+    "./index.html",
+    "./src/**/*.{js,ts,jsx,tsx}",
+  ],
   theme: {
     extend: {},
   },
   plugins: [],
 }
Now you can use Tailwind CSS classes in your React components like in the following example:
<h1 className="text-3xl font-bold underline">
  Hello world!
</h1>
Feel free to explore their website for more documentation, configuration guides and best practice tips. You can also check out Tailwind UI which offers a curated collection of beautifully designed components and templates to give you more inspiration.
Setup code linting
Always assume that you are working with other people, even if you’re still a beginner or working on a personal project. By setting up a code linter, you will ensure consistency across your codebase, avoid common mistakes and ease the onboarding of new developers by helping them sending pull requests.
We’re lucky that Vite already comes with a built-in ESLint configuration, but there are still more useful rules to apply:
- eslint-plugin-import to check import/export syntax and prevent issues with misspelling of file paths and import names
- eslint-plugin-jsx-a11y to check accessibility rules in JSX elements to ensure inclusive, user-friendly applications
- eslint-plugin-react to enforce React-specific coding patterns and best practices, helping to maintain consistent and high-quality code
You can apply these rules by installing the following packages:
$ npm install -D eslint-plugin-import eslint-plugin-jsx-a11y eslint-plugin-react
And update your .eslintrc.cjs file with the following content:
 module.exports = {
   env: { browser: true, es2020: true },
   extends: [
     'eslint:recommended',
     'plugin:@typescript-eslint/recommended',
     'plugin:react-hooks/recommended',
+    'plugin:react/recommended',
+    'plugin:import/recommended',
+    'plugin:jsx-a11y/recommended',
   ],
   parser: '@typescript-eslint/parser',
   parserOptions: { ecmaVersion: 'latest', sourceType: 'module' },
   plugins: ['react-refresh'],
+  settings: {
+    react: {
+      version: 'detect',
+    },
+    'import/resolver': {
+      node: {
+        paths: ['src', 'public'],
+        extensions: ['.js', '.jsx', '.ts', '.tsx'],
+      },
+    },
+  },
   rules: {
     'react-refresh/only-export-components': 'warn',
   },
 }
Running the npm run lint -- --fix command should output the following:
$ npm run lint -- --fix

> my-app@0.0.0 lint
> eslint src --ext ts,tsx --report-unused-disable-directives --max-warnings 0 --fix


/home/unnamedcoder/my-app/src/App.tsx
  3:22  error  Unable to resolve path to module '/vite.svg'  import/no-unresolved

✖ 1 problem (1 error, 0 warnings)
This error still occurs because of the vite.svg file imported in the App.tsx
component. I couldn’t find a way to fix this issue, so we need to disable this
rule exceptionally for this import by adding the following comment at the top of
it:
 import { useState } from 'react'
 import reactLogo from './assets/react.svg'
+// eslint-disable-next-line import/no-unresolved
 import viteLogo from '/vite.svg'
 import './App.css'
Running npm run lint again should produce no output, thus confirming that
everything is working as expected.
Setup code formatting
We’ve been expressing concerns about the misuse of ESLint, which was primarily designed for detecting syntax errors and enforcing code rules. It was often utilized for code formatting as well, a task for which it was not specifically tailored, leading to a lot of confusion and frustration.
The introduction of Prettier as a complementary tool to ESLint has addressed this issue. Prettier is a dedicated code formatter that automatically formats code according to a consistent style, allowing ESLint to focus on its core purpose of identifying and preventing potential coding issues.
You can install Prettier by running the following command:
$ npm install -D prettier eslint-config-prettier
And disable ESLint rules that might conflict with Prettier by updating the
extends section of your .eslintrc.cjs file:
   extends: [
     'eslint:recommended',
     'plugin:@typescript-eslint/recommended',
     'plugin:react-hooks/recommended',
     'plugin:react/recommended',
     'plugin:import/recommended',
     'plugin:jsx-a11y/recommended',
+    'plugin:prettier/recommended',
   ],
   // ...
   rules: {
+    'prettier/prettier': 'warn',
     'react-refresh/only-export-components': 'warn',
   },
Next time you’ll run the npm run lint command, you shall see a lot of warnings
about code formatting. You can fix them by running the npm run lint -- --fix
or prettier -c -w . commands.
Write unit tests
This step is highly recommended to keep your application working as intended and avoid breaking it when you will be adding new features or fixing bugs.
You don’t have to take snapshots, mock states, effects or internal functions of your components anymore. Unit testing became as simple as imitating user’s behavior and interactions over your components, thanks to the React Testing Library.
Vitest also simplifies the process by providing a built-in configuration for Jest, eliminating the struggle of setting up the testing environment, babel config, file transforms, … with the following steps:
$ npm install -D vitest @vitest/ui @vitest/coverage-c8 \
  @testing-library/react \
  @testing-library/jest-dom \
  @testing-library/user-event \
  @types/react @types/react-dom jsdom
Add the following entries inside the scripts section of your package.json
file:
   "scripts": {
     "dev": "vite",
     "build": "tsc && vite build",
     "lint": "eslint src --ext ts,tsx --report-unused-disable-directives --max-warnings 0",
-    "preview": "vite preview"
+    "preview": "vite preview",
+    "test": "vitest",
+    "test:coverage": "vitest --coverage",
+    "test:ui": "vitest --ui"
   },
Update your vite.config.ts by adding the testing configuration:
+/// <reference types="vitest" />

 import { defineConfig } from 'vite'
 import react from '@vitejs/plugin-react'

 // https://vitejs.dev/config/
 export default defineConfig({
   plugins: [react()],
+  test: {
+    globals: true,
+    environment: 'jsdom',
+  },
 })
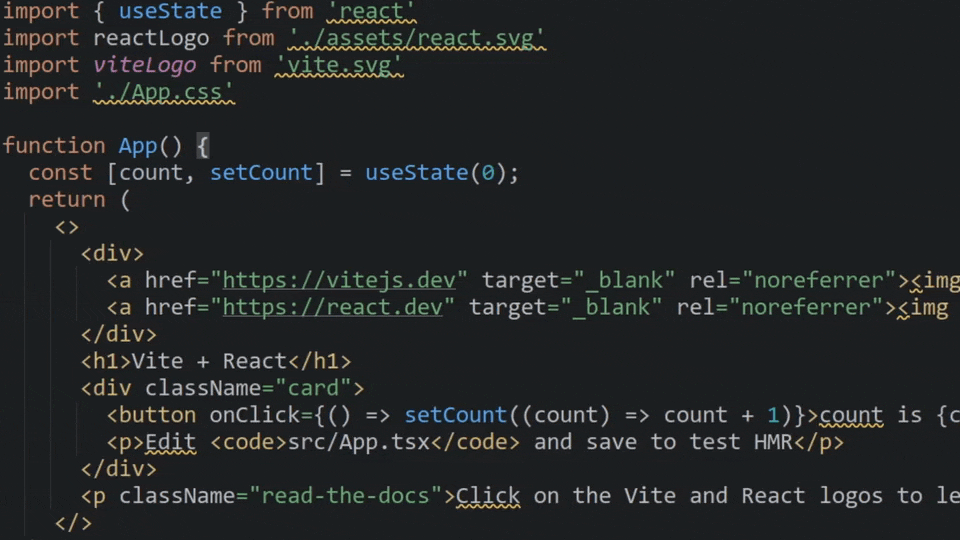
We know that the default application generated by Vite is a simple counter which can be incremented by clicking on a button. We want to ensure that the button works as intented.
The unit test for this component will be as simple as the following:
// src/App.test.tsx

import { expect, test } from 'vitest'
import { render, screen } from '@testing-library/react'
import userEvent from '@testing-library/user-event'
import App from './App.tsx'

test('displays initial counter and increments upon click', async () => {
  render(<App />)

  await userEvent.click(screen.getByText('count is 0'))
  expect(screen.getByRole('button').textContent).toEqual('count is 1')
})
You can run the test by running npm test. You should see the following output:
DEV  v0.31.0 /home/unnamedcoder/my-app

✓ src/App.test.tsx (1)

Test Files  1 passed (1)
     Tests  1 passed (1)
  Start at  11:12:44
  Duration  1.29s (transform 208ms, setup 0ms, collect 398ms, tests 79ms, environment 282ms, prepare 158ms)
You can also execute npm run test:ui to open a user interface and enjoy a more
interactive experience. It’s also possible to run npm run test:coverage to
check the coverage of your tests.
Add the following line at the bottom of your .gitignore file to avoid pushing
the coverage report to your repository:
coverage
Write end-to-end tests
Everytime I’ve been hearing about end-to-end testing, I was immediately remembering about the struggles I had with Selenium, telling my teammates to download the latest version of ChromeDriver, and the pain of writing tests in a very locked down environment.
I believe that you’ve also felt the same way, our prayers have been answered explaining the reason why Cypress has been created.

Cypress is still a wonderful option for end-to-end testing, also providing us a great way to develop our application without depending on the backend, thus focusing on the frontend development in an isolated way.
You can install Cypress by running the following command:
$ npm install -D cypress typescript start-server-and-test
Add the following entry inside the scripts section of your package.json:
   "scripts": {
     "dev": "vite",
     "build": "tsc && vite build",
     "lint": "eslint src --ext ts,tsx --report-unused-disable-directives --max-warnings 0",
     "preview": "vite preview",
     "test": "vitest",
     "test:coverage": "vitest --coverage",
-    "test:ui": "vitest --ui"
+    "test:ui": "vitest --ui",
+    "test:e2e-start": "cypress open --e2e",
+    "test:e2e": "start-server-and-test dev http-get://localhost:3000 test:e2e-start"
   },
The test:e2e script will execute the dev script, wait for the application
to be ready on the port 3000 before executing test:e2e-start which will
open Cypress in interactive mode.
It is therefore necessary to assign a specific port instead of a random one to
our development server by updating our vite.config.ts file:
 export default defineConfig({
   plugins: [react()],
   test: {
     globals: true,
     environment: 'jsdom',
   },
+  server: {
+    host: true,
+    port: 3000,
+  },
 })
Then run the following command to open Cypress for the first time and generate the initial configuration files:
$ cypress open
Once you’ve selected “E2E Testing”, you can close the window and create the
first test inside the cypress/e2e/App.cy.ts with the following content:
describe('default vite react app', () => {
  it('increments the counter', () => {
    cy.visit('/')
    cy.get('button').should('have.text', 'count is 0')
    cy.get('button').click().should('have.text', 'count is 1')
  })
})
We also need to specify the base url of our application in the file to match the
port we’ve set into the Vite configuration file, by adding the following line
inside the cypress.config.ts file:
 import { defineConfig } from "cypress";

 export default defineConfig({
   e2e: {
+    baseUrl: "http://localhost:3000",
     setupNodeEvents(on, config) {
       // implement node event listeners here
     },
   },
 });
Then execute it by running npm run test:e2e. You should now be able to see the
default Vite welcome page, with the tests passing.
Your IDE might have troubles while resolving describe, it and cy objects.
This can be fixed by creating a tsconfig.json file inside the cypress folder
with the following contents:
{
  "compilerOptions": {
    "target": "es5",
    "lib": ["es5", "dom"],
    "types": ["cypress", "node"]
  },
  "include": ["**/*.ts"]
}
Write component tests
Jest is still popular to run unit tests for our components. Its popularity is also due to its execution speed thanks to the jsdom dependency which allows it to execute the tests inside a minimal browser and fake DOM environment.
While it’s still a good choice for basic features, it can be a bit limited when you want to check the visibility of an element, from its CSS attribute or its dynamic position on the screen.
You would also have to spend more time mocking unsupported APIs, in order to retrieve some data from cookies of local storage, which is why it would be better to run the tests inside a real browser like the ones your end-users will use.
This is where Cypress saves the day again, by providing us a way to run our component tests inside a real browser.
First, add the following entry inside the scripts section of your
package.json file:
   "scripts": {
     "dev": "vite",
     "build": "tsc && vite build",
     "lint": "eslint src --ext ts,tsx --report-unused-disable-directives --max-warnings 0",
     "preview": "vite preview",
     "test": "vitest",
     "test:coverage": "vitest --coverage",
     "test:ui": "vitest --ui",
     "test:e2e-start": "cypress open --e2e",
-    "test:e2e": "start-server-and-test dev http-get://localhost:3000 test:e2e-start"
+    "test:e2e": "start-server-and-test dev http-get://localhost:3000 test:e2e-start",
+    "test:component": "cypress open --component"
   },
Create a new file src/App.cy.tsx with the following content:
import App from './App'

describe('<App />', () => {
  it('displays initial counter and increments upon click', () => {
    cy.mount(<App />)
    cy.get('button').should('have.text', 'count is 0')
    cy.get('button').click().should('have.text', 'count is 1')
  })
})
Then run the following command to open Cypress for the first time and run the component test:
$ npm run test:component
Select React.js as the front-end framework, and Vite as the bundler. At the time of writing this article, Cypress will expect you to have Typescript 4 installed instead of 5. You can safely click on the “Skip” button to continue.
Once you’ve chose your favorite browser and started the test, you should see the component being displayed with the tests passing.
Which framework should you pick? It depends on your needs. In my opinion, I would stick to Jest for very logical code and utility functions not involving anything about React, even if that part is not needed anymore since I would prioritize component functionality.
For any other tests needing a web browser, I would keep using Cypress for both component and E2E tests, while avoiding jsdom at all costs.
By the way, your IDE might have troubles while resolving describe, it and
cy objects. This can be fixed by adding the cypress item inside the
include array at the bottom of the root tsconfig.json file:
   // ...
   },

-  "include": ["src"],
+  "include": ["src", "cypress"],
   "references": [{ "path": "./tsconfig.node.json" }]
 }
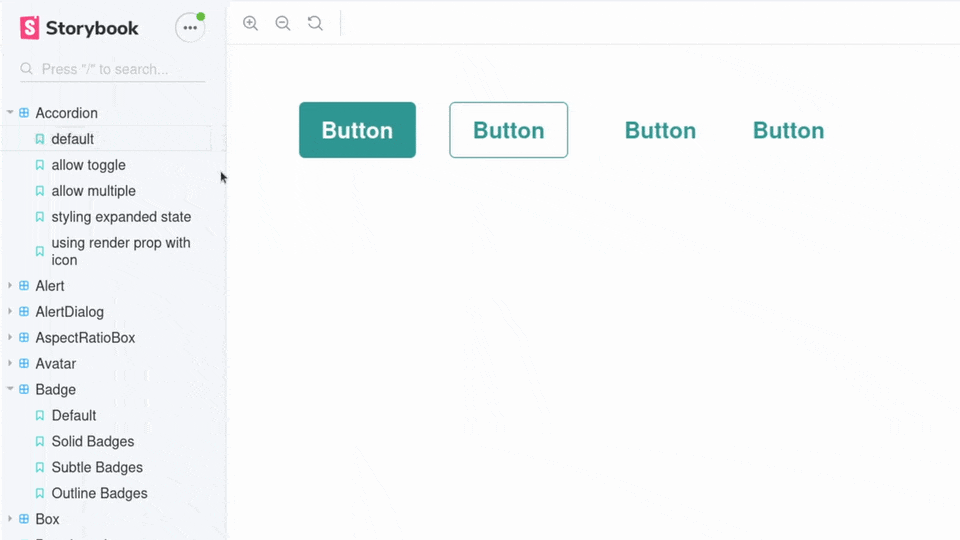
Adopt Storybook
This step is not required at all, but again, recommended. Incorporating Storybook into your development workflow offers a valuable advantage, as it allows isolated component development without the need for a backend to test various states such as success, loading and error.
Storybook can also be used as a true replacement of Jest’s snapshot testing feature, which was only checking the rendered HTML of a component, instead of its true appearance by taking in account the CSS styles applied to it.
Storybook can be installed with its dependencies by running the following command:
$ npx storybook@latest init
You can run it by executing npm run storybook, your favorite web browser will
open the served Storybook instance at http://localhost:6006.
Default stories were created during the installation inside the src/stories
folder. It can be removed safely, as we will create the story for our App
component inside the src/App.stories.tsx file with the following content:
import type { Meta, StoryObj } from '@storybook/react';
import App from './App';

const meta = {
  title: 'App',
  component: App,
  tags: ['autodocs'],
} satisfies Meta<typeof App>;

export default meta;
type Story = StoryObj<typeof meta>;

export const Default: Story = {};
Then you can see the App component being displayed inside Storybook, with the
ability to interact with it by clicking on the counter button.
Now you are able to focus on the component development without the need to start the development server and navigate to the page where it is displayed.
Add a CI/CD pipeline
We’ve set up up code linting and unit testing to our application, now we can make sure that our code is properly written and still works as expected before pushing it to our remote repository.
But there is still an issue, as we have to keep in mind that we are not coding alone, other developers might be willing to contribute to your project by sending bugfixes, new features or enhancements with pull requests.
There is no guarantee that the code they will send will be linted and tested accordingly to your standards, which is why we need to automate this process by adding a CI/CD pipeline.
There are many CI/CD providers available, but I will use GitHub Actions for this article.
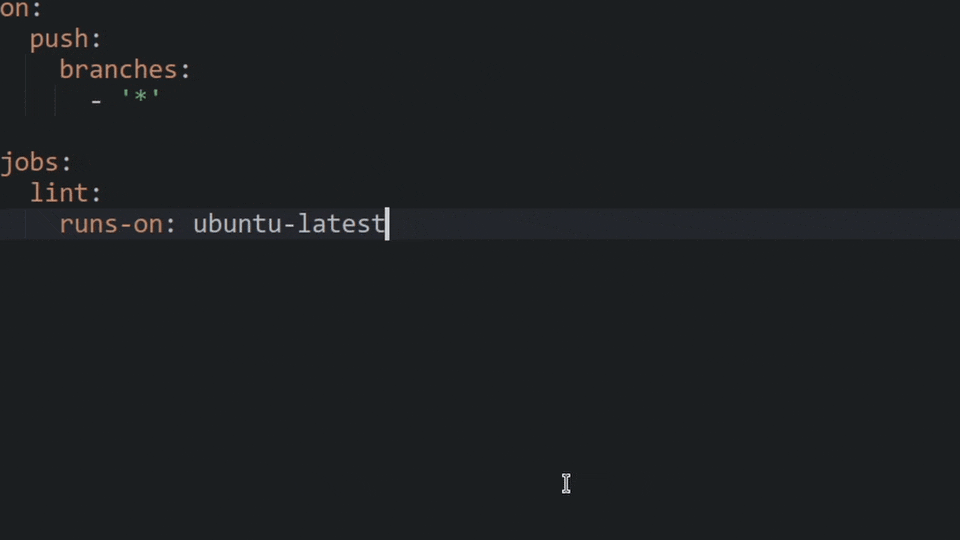
Create a new file .github/workflows/main.yml with the following content:
name: Main

on:
  push:
    branches:
      - '*'
  pull_request:
    branches:
      - '*'
This part of the file will tell GitHub Actions to run the pipeline on every push and pull request made to any branch of the repository.
Then we need to add jobs to the pipeline, which will be responsible for running the linting and unit testing tasks after preparing the testing environment.
This can be done by adding the following content to the file:
jobs:
  lint:
    runs-on: ubuntu-latest

    steps:
    - name: Checkout repository
      uses: actions/checkout@v2

    - name: Set up Node.js
      uses: actions/setup-node@v2
      with:
        node-version: 18

    - name: Install dependencies
      run: npm ci

    - name: Run linter
      run: npm run lint

    - name: Run unit tests
      run: npm test
Wrapping up
We’ve seen how to set up a React application from scratch, with the ability to write code in Typescript, lint it, test it through a CI/CD pipeline, which will run the linting and testing tasks on every push and pull request made to any branch of the repository.
This is a good starting point for any React application, but there are still many things to do, such as setting-up an automated release process, monitoring the errors in real-time, implementing visual regression testing, …
Unfortunately, these steps would have made this article too long, but I promise that I will write about them in the future.
Feel free to write a comment below if you have any question or suggestion, also subscribe to my Twitter, Instagram or LinkedIn accounts to get notified when I will publish a new post.


Leave a comment